How to Make a DIY Circuit Board at Home Easily?
Creating a DIY circuit board at home can be a rewarding venture. With the right materials and some patience, you can bring your ideas to life. This guide will explore the steps needed to create a functional DIY circuit board.
Begin by gathering essential components. You'll require copper-clad boards, solder, and a schematic. Planning is vital. A well-structured design can prevent mistakes during the building process. It's easy to overlook small details, but these can lead to significant issues later.
As you work, remember that perfection isn't always the goal. Mistakes happen, and some boards may not function as intended. Reflecting on these challenges can enhance your skills over time. Embrace the learning process and enjoy the journey of crafting your DIY circuit board.
Understanding the Basics of Circuit Boards and Their Components
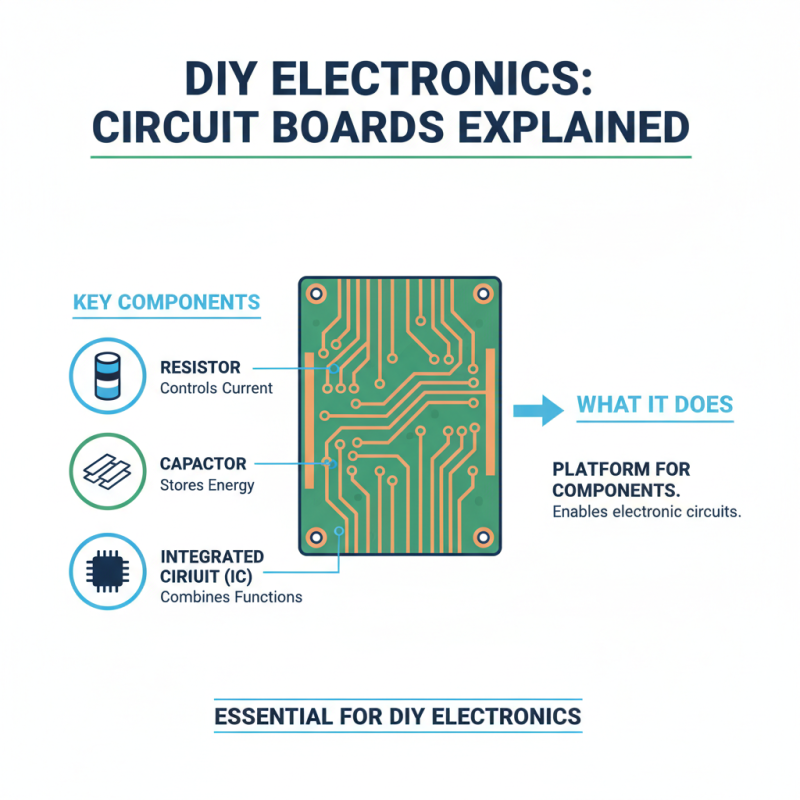
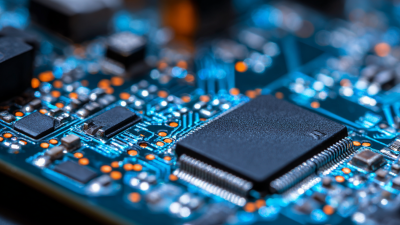
Understanding circuit boards is essential for DIY electronics. A circuit board provides a platform for various components. These components include resistors, capacitors, and integrated circuits. Each component plays a specific role. Resistors control current, while capacitors store energy. Integrated circuits combine multiple functions into one chip.
Making a circuit board can be tricky. Start with a simple design to minimize mistakes. An error in layout can lead to malfunction. Use a breadboard for initial testing. This allows for easy adjustments. Eventually, you may decide to create a permanent board.
Choose the right materials for your board. Copper-clad board is popular among DIY enthusiasts. It's durable and easy to work with. Ensure proper soldering to prevent cold joints. Each connection must be secure for optimal function. Watch for overheating during soldering. This can damage components.
Gathering Essential Tools and Materials for DIY Circuit Board
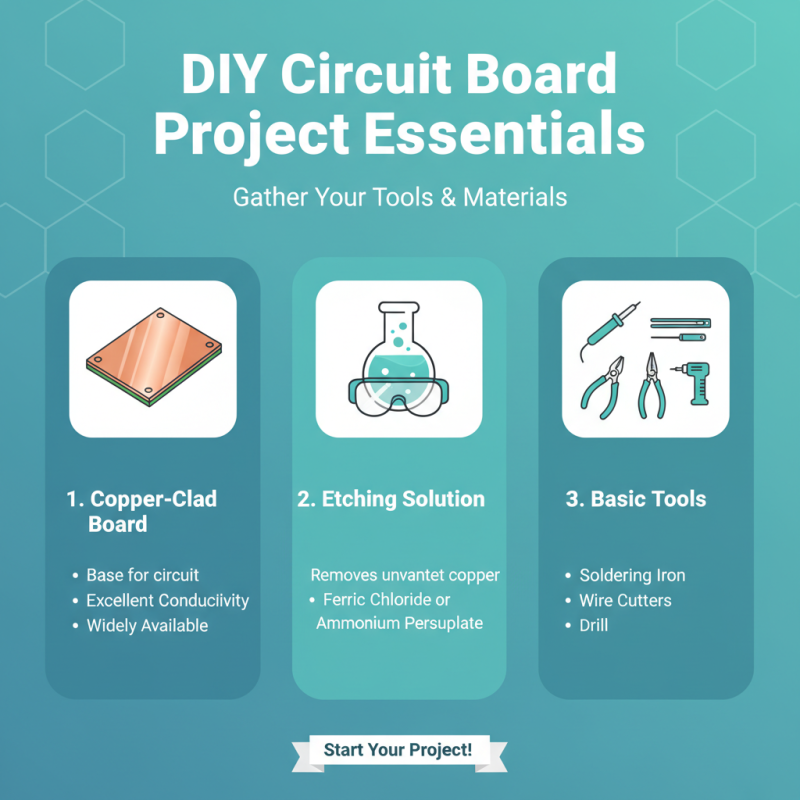
When starting your DIY circuit board project, gathering the right tools and materials is crucial. You'll need a few essential items. First, get a copper-clad board. This will be your base where the circuit will be printed. Industry reports show that copper is the most common material used because of its conductivity and availability.
For etching your circuit, you'll require ferric chloride or a similar etching solution. Be cautious when handling chemicals. Safety goggles and gloves are necessary. A basic soldering iron is vital for assembling components onto the board. The average DIY enthusiast uses a soldering iron with a temperature range of 350°F to 400°F.
Tips for a successful circuit board: Make sure to clean your board thoroughly before starting. Any grease or dirt can affect etching. A fine-tip permanent marker is handy for drawing your circuit layout. Use a ruler to ensure straight lines. Keep your workspace organized. This will help prevent mistakes.
Also, don’t hesitate to make mistakes. If your circuit doesn't work on the first try, that's part of the learning process. Testing and revising can lead to better designs. Embrace the trial and error. Your next circuit board will be even better.
Designing Your Circuit Layout Using Software or Paper
Designing your circuit layout can be an exciting process. You can choose to use software or go the traditional route with paper. Using software simplifies the design process. It allows for easy editing and scaling. However, not everyone feels comfortable with technology. Paper can be just as effective for laying out your circuits.
When designing, consider spacing. Keep components far enough apart to avoid short circuits. Make sure there’s room for connections. Also, remember to double-check your measurements. Mistakes can lead to frustration later on. Don't rush through your design; take time to reflect on each component's placement.
Here’s a tip: use graph paper if you stick to pen and paper. It helps maintain alignment and symmetry in your layout. Another tip is to start with a simple design. As you become more confident, introduce more complexity. This gradual approach lets you learn and adapt. Experimenting with design styles can lead to improvements. Embrace trial and error; it’s a part of the process. The more you practice, the better your designs will be.
Transferring Your Design to the PCB and Etching Process
Transferring your design to the PCB is a crucial step. Start by printing your design on glossy paper. Make sure the design is mirrored.
Position the printed design on the copper board. Use firm pressure to ensure proper transfer. An iron can help here. However, don't rush. Perfect alignment is key.
Next comes the etching process. There are various methods, but ferric chloride is commonly used. Prepare the solution in a safe container. Submerge the PCB carefully. Monitor the process closely. It may take longer than expected. Frequently check for proper etching. If the copper isn't fully removed, you may need more time.
Sometimes, the transfer doesn't work perfectly. Maybe the iron wasn't hot enough. Or the pressure was uneven. Adjusting your method is essential. Reflect on what went wrong and try again. Each attempt improves your skills. Embrace the imperfections; they are part of learning.
Assembling Electronic Components onto Your DIY Circuit Board
Assembling electronic components onto your DIY circuit board can be a rewarding yet challenging process. Begin by carefully placing each component in the correct position, ensuring that the polarized ones are oriented properly. Use a pair of fine-tipped tweezers for precision. It's easy to accidentally swap resistors or capacitors if you're not attentive. Focus on one section at a time to prevent confusion.
Once you're satisfied with the layout, it's time to solder. Heating the soldering iron requires caution; it can easily damage the circuit board if you overheat it. Applying too much solder can lead to bridges, which short-circuit connections. Keep the solder joints neat, but it's okay if they aren't perfect. A valid mistake might provide a chance to learn. If a connection doesn't seem stable, take a moment to examine your work.
Testing your assembly is crucial. After soldering, verify each component's function with a multimeter. If something is off, retrace your steps. This approach helps reinforce your understanding of electronic paths. Embrace the trial-and-error nature of this craft. Mistakes often lead to the most valuable insights and skill development.